|
| My patio - the almost finished version. |
Well, hello again! In our previous chat, I had mentioned that building my patio was a story for another time. I think now is as good a time as any to at least begin the tale with the first stage of that project.
I had just moved into my new place and was anxious to put my own little stamp on it. I planned and measured and dreamed and somehow managed to convince myself that even though I had never tackled any project of this nature, or had any experience with construction of any sort, or had even watched any projects of this nature being built by anyone else, that I would be able to do all of this myself. Though I don't remember being able to watch him in action, construction was in my grandfather's blood, so maybe it somehow got into my genes, too? But, I mean, how hard could it be, right? A couple of nails here, a little mortar there, lay the stone like so, a little sweat labor and voila - paradise created! Right? Hahahahaha!
I had a little tiny area for my patio, about 10' by 14'. I had inherited it with an already laid floor made up of 12" square red pavers. They were a little uneven and it was just kind of drab with a few bedraggled weeds poking through here and there. But, when I looked at that barren little area, I saw a tall white lattice fence along two sides strewn with pale pink climbing roses, or honeysuckle, or jasmine, or morning glories or maybe even a nice red bougainvillea. I just couldn't decide what I wanted most and decided to leave those types of details for later. And, in front of the lattice walls, I saw warm yellowish-reddish-orangeish brick planters filled with plants and flowers. And tucked in the corner at their junction, a raised area with a little patio table and a couple of chairs where I could relax at the end of a long day and enjoy a glass of fresh-squeezed peach lemonade (the recipe I use is at the end of this post) or a nice glass of wine and dinner. Under my feet, I pictured a floor of pale yellow buckskin flagstone interspersed with irish or scottish moss or creeping thyme or perhaps baby tears moss. Again, I just couldn't decide, well, there'd be plenty of time for that later. In the corner "kitty-corner" opposite from the table area, I wanted a quiet, peaceful little pond with a little fountain cascading soothing water sounds. And, perhaps a two-seater glider or a little free-standing swing against one wall of the lattice directly opposite the pond (right next to the raised area for the table). Someplace to relax and read a book or just while away an afternoon in quiet contemplation. I know, I know, I said the area was only about 10' by 14', but on paper, it looked like it should work, a little snug, but do-able . . . :-)
So, I started making my lists. Lists for what would I need to get for the lattice walls and to hold them up and in place. What I would need to get for the brick planters and for the edging. What I would need for the pond and the flagstone. From brick to stone, 2x4s to lattice panels, concrete to mortar, screws to basket hangers and all the tools and accoutrements needed to accomplish all the tasks at hand. And then I began shopping to see what kind of lattice would be available, what types and colors of brick and flagstone were available, the sizes things came in and started pricing things out. I decided I had to have white lattice and as I mentioned before, I had my heart set on some yellowish, reddish, orangeish bricks, and some yellowish golden buckskin sandstone flagstone and was delighted to be able to find exactly what I had envisioned!
And bit by bit, I accumulated most of what I would need, although some of it would be purchased as I discovered I needed it. I carted it all home, trip after trip after trip in my poor little car. You would have thought I had a truck based on my purchases, and the looks on some of those employees faces when I pulled up and said "Load 'er up!", were priceless. WHAT? ? ? C'mon, you're telling me you've never see a Toyota Celica pick up truck before? ? ? I can't tell you how many trips it took just to get all the brick and flagstone home. And, to this day, I can not tell you how I managed to get those four 4'x8' lattice frames home. I must have tied them to the top of that thing, but really I just can't imagine it working, the car was so small! The poor little thing was loaded with so much stuff, the frame was practically riding on the wheels! But, what a trooper! She made every last trip without a hitch, though some of it was pretty slow going! And on a couple of bumps, I could have sworn I saw some chunks of rubber tires go flying.
I think I was becoming a little famous or infamous, depending on your point of view, around the suppliers I visited (and I suspect I provided them with more than enough fodder for stories with which they regaled their friends over beer). Could you cut these bricks as marked for me? What kind of cement do I need? Can you pour the cement into smaller containers for me? Can you cut the 2x4s? Can I please just look through one more stack of flagstone to find just the pieces I want? And so on. And the look I got when I was discussing how much sand I would need for my little project (which was 3/4 ton, by the way)! The guy kept glancing dubiously at my car. I'm pretty sure he thought I was going to try to load her up with sand! I could hear him telling his buddies now, "That kook was back again and this time she wanted a scoop of sand in her trunk." I was so tempted to ask him how many trips he thought it would take in my vehicle to move 3/4 ton of sand, just to see his reaction, but I managed to fight the urge. I did take pity on the poor car and rented an actual pick up for that job. I didn't want to have to try to clean sand out of the trunk carpet . . .
I stacked all the 2x4s and lattice in the back. I had bricks and flagstone stacked as neatly as possible in my driveway. Stuff was everywhere!
I started trying to figure out in which order things would have to be done so I didn't end up with a problem and have to tear something out and have to redo it later. After all, it would have been extremely difficult for me to have put the brick planters in before I put up the walls behind them. (The walls were to hide the sheds bordering those two sides of the patio area, so I couldn't put them up from that side.) And I decided it would be easier to buy a preformed pond rather than trying to free-form my own, but in hindsight . . . I'm not so sure it actually was easier! With a free-form pond, you don't have to try to dig a hole that nearly exactly matches anything . . . except the shape you want. However, after all the visits from the marauding raccoon that I told you about in my previous post, the preformed pond turned out to be the best choice for me! At least he couldn't poke holes in it like he may have been able to do if I had used a flexible plastic liner.
So, anyway, it was a no-brainer that the first thing I needed to do was pull up the existing pavers and level the ground. But, instead of building up the low areas, I decided to try to scrape off the high areas. (If you're taking notes, please make sure to mark this next thing down as a "DON'T do it".) What I learned: Always make sure your patio area is a little higher than the surrounding areas. :-) Why is that you ask? Well, you'll have less of a big pond to wade through later when it rains . . . Oh, . . . and while we're at it, . . . there's this lovely stuff called sand that makes it much, much easier to level things out than trying to level out hard-packed dirt with a spoon. Ok, I didn't really use a spoon, I just made that up, but the experience certainly felt like that's what I used.
Then I began laying things out in the area just to get an idea of how it was going to look and fit and to give me a better idea of where to start. Looking around, I realized that I would need to get the lattice fence up first. Then get the planters built. And then lay out the brick border before I can put the sand down and level it off. But, I also wanted to get the pond in so I could more accurately determine where that border would be and keep from messing up anything else while digging the hole for it. And I realized I would have to figure out something to keep the brick edging straight as I put it down.
 |
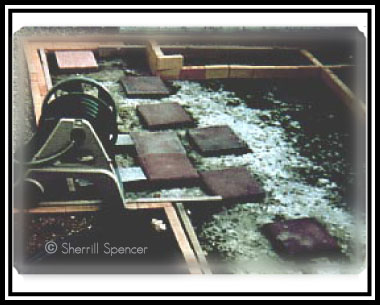
| Early stages of planning and layout. What a mess! |
So, first up, I decided to get all the holes dug. One for the pond and some for the 2x4 posts to hold the lattice walls. So, off to the big-box DIY store I go to buy a post-hole digger and the pond in my big delivery vehicle.
What a marvelous invention those post hole diggers are! I actually had a lot of fun digging those holes! That is, until I got to the last one. (Get your pencils ready, this is another DON'T I learned the hard way . . . This is an important one!) Do not dig ANYTHING until you call
USA first! So, there I was, feeling pretty good, thinking this is actually kind of a piece of cake, I'm down to the last hole and all of the sudden, I noticed these black thingys down in the hole. I stopped and peered in a little closer . . . what the . . . heck? ? ? Wires? What are wires doing down there? ? ? Well . . . scratching my head, I reasoned I was still standing, so it couldn't have been electric. Maybe they were just left over from some other project way in the past? While I was puzzling over it, I got a bad feeling. I went inside and slowly picked up the phone and put it up to my ears. Sure enough. Deathly silence, there was no dial tone. Over to the neighbors I go to borrow their phone.
 |
It is a bit hard to see the wires - but, there is a black, J shape along the right and bottom
side of the hole, and two lighter colored wires coming down from the top right of the hole. |
The phone company comes out, checks things out and tells me that I was extremely lucky. Apparently, I had just missed the gas line by about a 1/2". They gave me the "call before you dig" lecture, then proceeded to widen that hole to the size of the Grand Canyon so they could sit comfortably on the side of it to fix the line. Don't get me wrong. I was very appreciative that they came out so quickly. And that they didn't charge me (though they explained just how steep the fine could have been . . . YIKES! . . . if I pulled this stunt again, next time I would be extremely poor at the end of it) but, dang, did they have to make the hole THAT big just to put a couple little lines back together!
After they left, I set about filling the hole back in, but not too much! I still had to get the post in! (I suppose if I'm here long enough, I'll find out one day that I encased the phone line in cement when I seated the post.)
Well, anyway, I am finally ready to seat the posts. So, off I go to the home store to get some concrete. Who knew there were so many choices! What in the world did I need? Fortunately, there was a kind gentleman there who took pity on me and was extremely polite and helpful. Though, I suspect deep down he was trying desperately to refrain from bursting into laughter and was already planning on how he would be able to entertain his buddies over cold beers with stories of the blond who came in that day. I can hear it now, "So, this blond comes in . . ." But, he remained very polite and professional and even gallantly helped pour the bags of cement into some plastic containers I had brought in because I suspected I would not be able to lift the bags as they were. I was right.
He said all I would have to do is pour the cement in the holes and then pour in the water and let it set. So, I did. I nailed a string to each side of the top of a 2x4 and hung washers on the other ends to aid in getting the posts plumb and poured the cement in, making sure the washers were hanging right along the post on all sides and then braced the post in position and poured the water in. While it began to dry I went on to the next one, putting one of the lattice frames in between to get the spacing right. One by one until they were all in. Easy as pie! Once the cement dried, I painted the posts and put up the lattice frames between them, securing them to the posts with screws. I have to admit, I thought it did look pretty nice when it was done. The tops were even pretty darn close to being perfectly level! Woohoo! Bring it on! Get me a construction job! I must admit, I was a bit impressed with myself! Maybe I do have grandpa's construction genes after all!
Ok, now for the pond. Off I go in my Celica truck and pick out my pond and grab a few bags of sand to fill in around the edges once the pond is in place. Once home, I set the pond in place, trace it's contours in the dirt and grabbed the shovel . . . and then I remembered my previous digging lesson and called
USA. It took them a couple of days to come out, but they approved the area I planned to dig, so then I dug and dug and dug. And dug. And then, dug some more. Funny thing, hard-packed dirt apparently does not want to be dug. And who put those roots in the way anyway? ? ? I'm pretty sure they were made of steel. I grab the post hole digger and use it to break stuff up a bit and then try to smooth it out a bit with the shovel. I set the pond in to see if it works. Nope, not nearly deep enough. Dig, dig, dig. Now? Nope, not yet . . . still not deep enough. Dig, dig, dig . . . NOW? ? ? ? Nope, keep going! You gotta be kidding me! By now, I feel like I am digging through cement with a feather. Not getting anywhere fast. I try setting the pond in again. Finally! Well, at least close enough. So what if the top of the pond is about an inch above the ground. Once the baby tears moss is in, who will know? ? ? So, I put the pond in, level it up, pour some sand in around it to fill in the gaps between it and the dirt and snug it into place. I try to mound up a little dirt around the top to close the gap, and I'm good to go!
 |
This is my little pond in one of it's early stages. See, there
really isn't enough room for a raccoon to swim in it! |
Ok, I'm on a roll now! Let's lay some brick for those planters in front of that pretty lattice wall! Off to the DIY store. Same gentleman as before gets to help me pick out something to secure the bricks in place. He shows me what I need and again, very helpfully pours the mortar mix into the plastic containers I brought. The powder went everywhere. What a mess he had to clean up when we were all done! I hope no one dropped their drink! Then he says "Just add water, mix it well, scoop some mortar onto the brick with a trowel and set it in place and scrape the excess off before it dries so it looks nice, even and concave between the bricks." "Great! Sounds easy! How much water?" I ask. He looks at me and says "Until it is the right consistency." "Great! What is that?" I reply. He blinks and looks at me, and then blinks and looks as me some more, apparently taken a little aback that I shouldn't already know this, or perhaps he just didn't know how to describe it. So, I ask helpfully, "Like peanut butter?" "No, no not that thick." "Like a milkshake?" "Yes, that's it," he says happily smiling from ear to ear, "just like a thick, chocolate milkshake!"
So I get home and start to work. I mix up the mortar and start slathering away. Too bad he didn't tell me to use the handle of the trowel to smooth out the mortar between the bricks. (Ok, here is another DON'T . . . This is another really big don't. It's important!) Do NOT use your fingers to wipe off the excess mortar between the bricks. Mortar is made of sand. Sand, like in sand paper. And surprisingly, just like when people use water to keep things from getting too hot and to keep the friction down when they are sanding some things, when your fingers are wet, you don't realize that your fingers are being sanded down. So, when I stopped that day . . . That long, long day, where I sat on the ground, laying brick after heavy brick. And moved more piles of heavy brick over to the work area as I ran out of piles of heavy bricks. I was tired. And dirty. And very, very sore. My back was apparently the only part of my body left, because, at that point, that was all I could feel. And it felt . . . BAD. I crawled up the steps to the house, slithered into the bathroom. And took a shower. A nice, long hot shower. And when I dried off, I experienced the worst pain my fingers have ever known. I looked down. And right where all my fingertips should have been, there was nothing but bloody stubs. So, here is my two-part lesson in bricklaying . . . do NOT use your fingers to smooth away ANY excess mortar; and bricklayers, no matter what they make, do not get paid enough.
I probably should have taken advantage of that period in my life where I could have committed all sorts of crime and not have left any fingerprints, but I didn't. I mean how often does one lose one's fingerprints? The answer is, twice . . . well, ok maybe three times. Apparently, some people are just slower learners than others. We won't mention any names here, but don't blame my mom, she tried really, really hard. You just have to look at what she had to work with! Sorry, mom, sometimes I just ain't the brightest bulb on the porch!
But the fun did not stop there! This is just where I will leave off for now. To be continued . . .
Fresh-Squeezed Peach Lemonade
1 C Lemon Juice
1 C Sugar
4 C Water
Peach Nectar to taste (I usually use Kern's)
Wash your lemons. While the lemons are still whole, it is easier to zest them, so cut, peel or zest some of the rind, avoiding as much of the bitter white pith as possible. Squeeze your lemons. Pour the lemon juice into a pitcher with 3 cups of the water and refrigerate. Put the sugar and the remaining cup of water in a small saucepan with the zest and bring to a boil, stirring occasionally. Let cool, strain and pour into the lemon juice. Add peach nectar to taste.
For a pretty presentation, rim the glass with lemon juice and then dip in sugar. Add ice and a couple of very thin lemon slices and pour in the lemonade. Garnish with mint. Yummmm!